How to tolex a guitar amp cabinet
Author: Kevin M Date Posted:5 May 2018
How to Tolex a Cabinet.
One of the top questions I get is how do I tolex a cab or what glue do I use. So I thought I would add a bit more information about the process, products and tools used. As you read this page you should consider this a guide only as there are many ways and each way is often to do with your work environment and of course your skill level.
This information is basically the beginner's course with the assumption that only one person will be doing the work.
A few tips before starting
- Pick a black tolex like Nubtex or Bronco... Yes yes, I know you want to make a snakeskin or bright coloured cabinets but trust me, until you get the hang of it black is your friend.. it will hide your imperfections.
- Your cabinets need to be sanded smooth and have rounded edges (at least for this instructional example)
- Ensure you have wiped all the dust off. Use a bit of metho and a cloth after you think its clean and you find it takes a bit more dust off.
- Check your corners fit flush before even thinking about putting tolex on.. If they don't sit flush against the cabinet then you have to remove more of the corner so they do.
- Paint the inside of your cabinet black in advance.
Tools required when covering your Cabinet
- A felt tip Pen
- A straight edge ruler. At least as long as your cabinets width
- Good Quality scissors
- Either a roller (I use a lino roller (for inking vinyl cutouts) but I know a guy who uses a silicon block with slightly rounded edges.
- A few 3" & 1" cheap paint brushes (if you are slow, you may need several)
- Glue (I list the type below)
- All you amp parts, Tolex, Corners, Feet, Screws etc
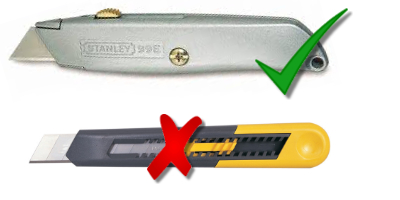
- Finally, a very sharp (new blade) Cutter.. typically like a Stanley knife, Don't be tempted to use a thinner type as you need a good hard precise cut and the thinner versions tend to give or bend a bit.
Glue:
There are a range of glues and glueing methods but we will stick to the ones I use as I know it works fine.
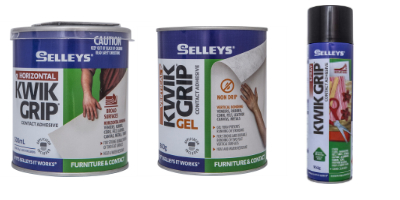
I use Selleys KwikGrip. I would recommend the standard tin on the left, however, the gel version allows for a bit more work time,, Finally, the spray glue is a very expensive/messy way but works. (it will take quite a few cans to finish a cabinet whereas a 1 litre of standard Kwikgrip will be enough for an amp head..
Marking out the shape of your cabinet.
Note: We are going to show you an example of a cabinet that won't fit on to one piece of tolex.
- Cabinet we are cutting for is 425mm wide x 250mm high & deep
- Clear out a good flat clean area to work as the tolex to start with will be 1350 x 1000mm
- Take your tolex and lay it out flat. A tip: If you want all your creases out of your tolex, lay it out in the sun for 10 to 30 minutes (depending on the heat), it will remove any creases (assuming its good tolex)
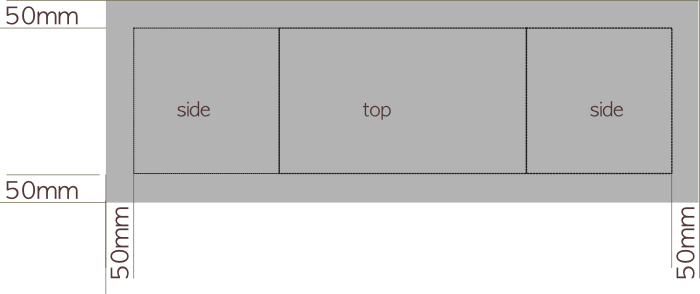
- Start with your cabinet about 50mm from the side and top edge of the tolex marking out a side, then the top and then another side
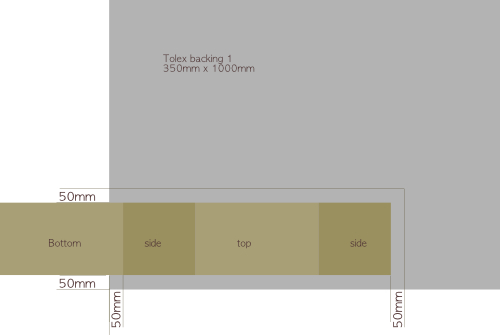
- Now you should have a piece 1025mm x 350mm marked out as per below - don't panic about the bottom as we will cut this separate
- Now, cut a piece 525mm x 300mm for the bottom. (careful to be efficient when cutting as you may need some more material for backboards.
- Now you should have two pieces of material cut to size and you cabinet marked out on this. It is important to draw the cabinet shape so you paint glue within the lines.
Glue the cabinet and tolex:
- Open the Kwikgrip and stir until completely mixed.
- Take the 3" Brush and brush on a thin even layer to the larger piece of tolex material first (but don't go out the lines).
- Note: The glue should be no thicker than thinly buttered bread and all the way to the edges
- Try not to go over and over the glued area as it will begin to ball up and you don't want that, you need a smooth painted finish.
- Now apply glue to the top and sides of the cabinet.
- As that's drying, you can now paint the smaller piece of tolex (once again, don't go out over the lines)
- Now Wait until the cabinet and material are touch dry...tacky but without any residue or resistance and definitely not wet.
Joining the two
- Start by placing the side of the cabinet on the tolex. Don't mess this up.. you need to set it so the cabinet rolls on to the top, not the bottom. The bottom is the last piece we do
- Very Important: Make sure its square as when you roll it, it will need to stay within the lines.
- Now roll the cabinet so the top is within the lines and finally over again to the next side.
- Quick flip it over so it's sitting on the bottom and rub in nice and flat removing any bubbles (which you shouldn't have any if you painted the glue just right and left it to dry long enough :) )
- Once you have flattened out the tolex flip it back over so the bottom is up and paint a thin layer of glue on the bottom, ensuring that you paint a thin layer of glue into every area on the bottom and into the sides that may be missing some.
- Once the bottom is touch dry you will need to be careful here.
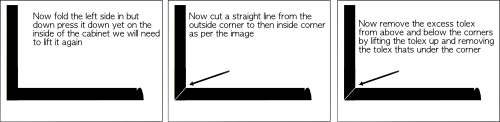
- fold the little piece from each side over the bottom of the cabinet carefully making sure there is no bubbles but also not pushing too hard on this as we will need to lift it again,
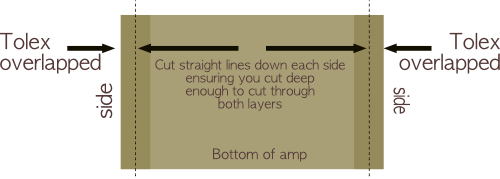
- Then place the last piece of tolex on the cabinet and this will lay over the side pieces that you folded over a second ago.
- Now using a straight edge cut a straight line between the two layers
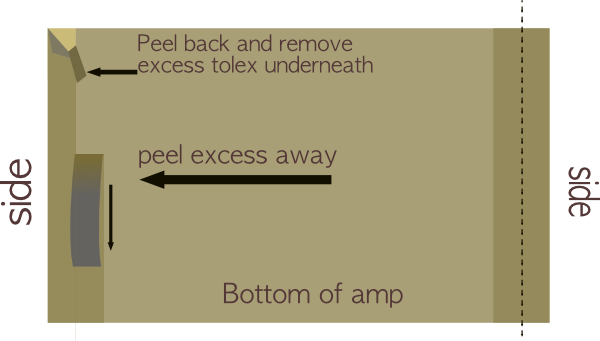
- now peel the excess tolex off from the top then lift the piece that has tolex under it up and peel that away as well,
- you can push the two sides together for a tight nice fit.
See the second video below for a great example of this
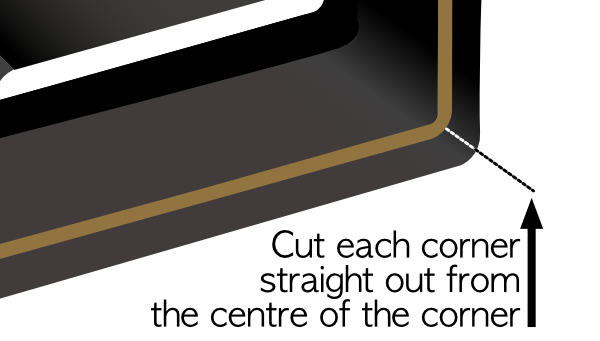
Now for the corners
- The first thing you need to do is cut the corners, have a look at these diagrams
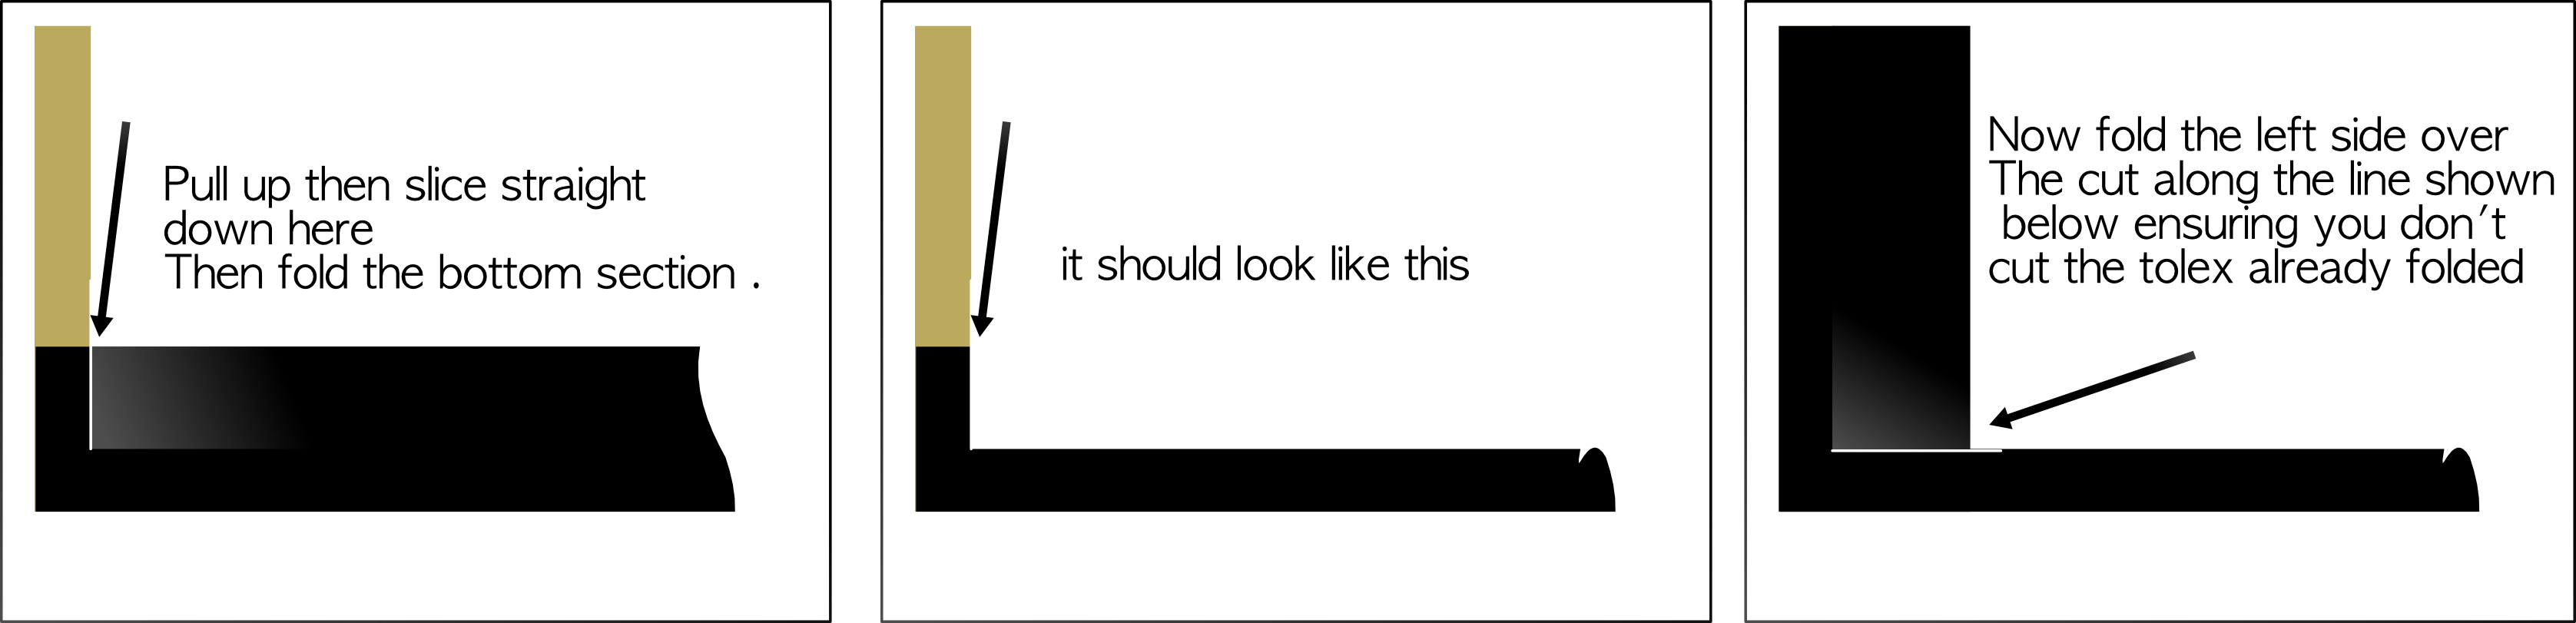
 which should result in this
- Now paint the edges of the cabinet and twenty odd mm inside with glue as well as the tolex area that will fold in
- Let this go tacky and then fold in carefully.. you don't need to stretch tolex, just a firm pull and fold and stick the edges down.
- As you do it, make sure you cut the edges like these images
- Continue around all corners.
Well, that's the gist of it. Now the reality is that a picture says a thousand words and even better is a video, So I have included a couple of video links that may help you.
I did not do these videos but reviewed them before sharing them to see if they would help. Note the nuances of each person methods.
Video Examples
The following videos show great examples of how to tolex.
Amplified Nations video of a cabinet being covered is a good one. It shows how fast he works, remembering Black Nubtex or Bronco is your friend to start with, and corners will cover you bad joins
This example shows the cut and join method I mention for the bottom
Undle Dougs Videos are great examples in all aspect of amp building but his tolexing video is very detailed and shows clear examples of corner cuts, curved areas and grill cloth across 3 videos
And now the grill cloth example.


